Swish has 30 New Colors and you get 35% off!
Plus a tutorial about Lace.
We've been on a bit of a lace kick lately—'tis the season, after all! Many of you expressed interest in lace knitting in a previous edition of Knit Peeks, so we thought we'd share a tutorial on how to block lace.
But before we get to that, let's not bury the lead: Swish now comes in 30 new colors of worsted weight yarn! How exciting is that? And because we appreciate your subscription, you'll find a discount for 35% off Swish worsted at the bottom of this newsletter. This discount even applies to the new colors!
As always, we kindly ask that you don't share this discount code publicly, as we reserve the deepest discounts for our paid subscribers. Now, on to the tutorial…
How To: Block Lace
Before you block your lace project, you will need to start by getting your project damp—but not soaking wet! Gently spray your project with a water-filled spray bottle or Soak Flatter Spray. You will need a flat, padded, colorfast surface that’s big enough for the project; we recommend the Knit Picks Premium Blocking Mats. Let's get started!
Recommended Tools:
Your project must be damp (not dripping wet) before you begin blocking. Get your project wet and remove the excess water. If you are in a hurry, wrap it in a towel to protect it and run it on the spin cycle of your washing machine for just a minute or two. If you’ve got time, you can line a sink with a folded towel and nestle the knitting into the towel and saturate it with water. Then let the water drain slowly through the towel. After a couple of hours, the project will be just damp enough for blocking.
You will no doubt be surprised at how much your project will expand when it is stretched, so be sure to have plenty of space. Find a flat, padded, COLORFAST surface that’s big enough for the project. You can also use a carpeted area or large panels of foamcore covered with a sheet or tablecloth. Gather up the lace into a heap, and gently transfer it from the towel to the pinning surface. Loosely lay it out flat with the right side facing up. Now the blocking begins!
Wire Blocking
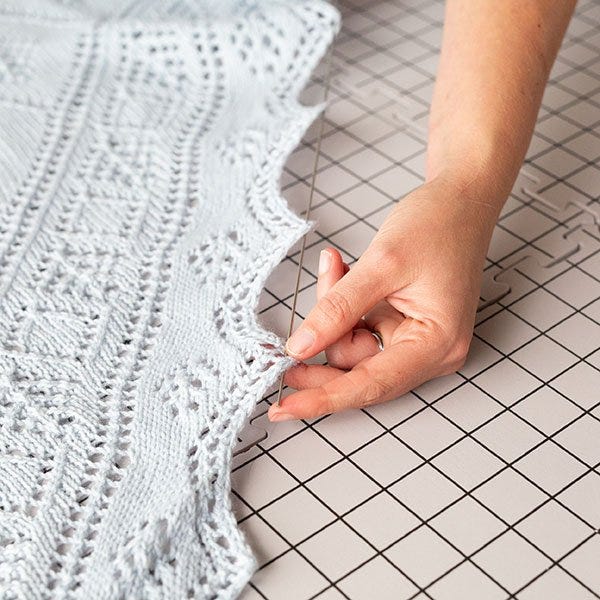
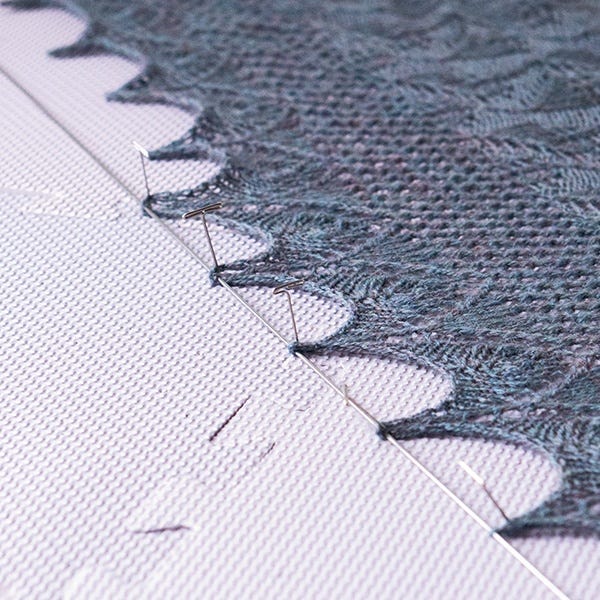
Blocking wires are a quick and easy way to block your lace project. Simply slip the wire through the edges of your lace project and place pins along the inside of the wires to hold them in place. If you have scalloped edges, you will want to slip the wire through the outer edges of your scallops to emphasize them. Follow the same rules as pin or string blocking by measuring the radius of your finished piece as you adjust the wires.
Pin Blocking
Gently stretch out the piece and determine where the edges will be pinned—e.g., for a round shawl, put the center of the shawl in the center of the pinnable surface. For a triangular shawl, be sure the shawl is positioned so the long front edge will fit, and the point will, too. If the shawl is really big, try folding it symmetrically in half and pinning the two halves as if they are one smaller item—putting all pins through both layers into the pinnable surface underneath. Be sure to pin along the fold as well.
Pin out the edges, pulling as far as easily possible, putting in a pin every inch or so on straight or curved edges or in each point of a scalloped edge. Remember to visually check to see your shape is what you intended it to be when it is completely pinned down; e.g., a square is still square, and a circle is still circular. Use a ruler to check comparable points for consistency.
Ruler Blocking
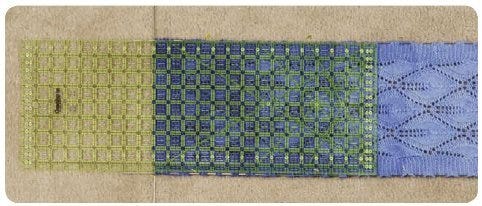
If you are blocking something straight and of consistent width, like a scarf, a quilting ruler can be very handy. These rulers come in common widths of 4″, 6″, 6½”, 8½”, 12″, 12½” and 14″. Choose the size closest to your desired finished width. Lay the ruler over the scarf and pin the edges of the scarf (with or without blocking wires) just to the outside of the ruler. As you pin down both sides of the length of the scarf, you will create a channel through which to slide the ruler as you continue to pin. This ensures that the scarf is pinned in a straight line. Also use the ruler to pin the ends of the scarf in a straight line at the edge of the ruler.
Keep reading with a 7-day free trial
Subscribe to Knit Peeks from Knit Picks to keep reading this post and get 7 days of free access to the full post archives.


